As an Interaction Recording user, depending on your access levels, you can download recordings in bulk from the Interaction Recording portal and save them to your computer using the Download Client application.
To download recordings in bulk, the Download Client application must be installed on your system. The Download Client application searches for and saves audio files locally on the client computer along with Conversation Information, Calling Party Information, Called Party Information, and so on.
NOTE: Although it is possible to download up to 10,000 call recordings at a time, it is recommended to download in multiple smaller batches of up to 5000 call recordings; it is expected that this is more efficient and less time-consuming. Downloading 5000 call recordings typically takes 10 hours; however, download duration varies depending on the average length of the recorded calls.
The following output formats are supported:
- WAV file (for the audio data)
- XML file (for the metadata)
The procedure for installing and configuring the Download Client application involves:
- Installing the Download Client Application
- Logging in to the Download Client Application
- Configuring the Download Client Application
See the following sections for more information:
For short training videos regarding the Download Client application, see
MIR Bulk Download Client Learning Videos.
Installing the Download Client Application
NOTE: This application needs to be installed on the user’s client machine in order to download the call recordings. If you have customized the client configuration, you will need to reconfigure the customization after installing the new version.
To install the Download Client application:
- Download the Client application here and save it to your computer.
- In the software installation directory, double-click the install.bat file.
- In the InstallShield Wizard window, click Next.
- Click Change to select a different target directory, or click Next to retain the default target directory.
- In the Setup Settings window, click Next.
- Click Install to start the installation process.
- In the User Account Control window, click Yes to proceed with the installation.
A status bar indicates the progress of the installation. - Click Finish after the installation completes.
The Download Client application is successfully installed.
After the installation is complete, a program group is created in the Start menu of Windows and the Download Client Config program icon appears on the desktop.
Logging in to the Download Client Application
After installing the Download Client application, you can log in to the application.
To log in to the application:
- Double-click the program icon Download Client Config on your desktop.
The Login window opens.
NOTE: The authentication details are automatically populated.
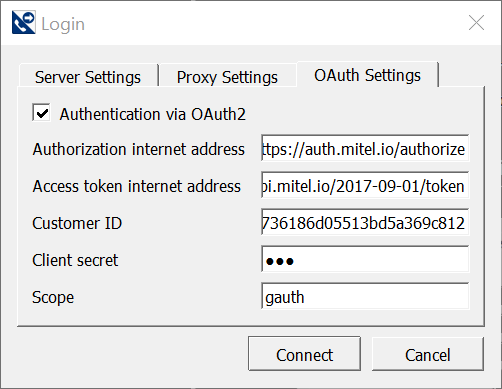
- Click Connect.
A web page opens for you to enter your user name.
NOTE: After logging in and logging out of a session, to log in again within a specified time, the user need not provide the login credentials; the user is logged in automatically. - Enter your Account Portal user name and click Next.
- Enter your Account Portal password and click Next.
A web page with a callback received message opens and the Download Client application loads.
Configuring the Download Client Application
You can customize the Download Client application by configuring it for your specific requirements.
To configure the download client application:
- On the Jobs: Settings subtab, click Create New Job.
IMPORTANT: Do not create more than one job. Creating multiple jobs may cause download issues. - Select the Search subtab and configure the settings as desired. (See Jobs: Settings for more information.)
- Click Save Jobs.
- Return to the Jobs: Settings subtab, and select Activate in the Status drop-down list.
- Click Save Jobs.
- Select the Connection tab, and enter 8 in the Parallel processings field.
- Click Apply.
Application Parameters
To further configure the application, you can set the fields in the following tabs:
Jobs: Settings
Job settings such as export path, export format, and compression type can be configured in the
Jobs: Settings subtab.
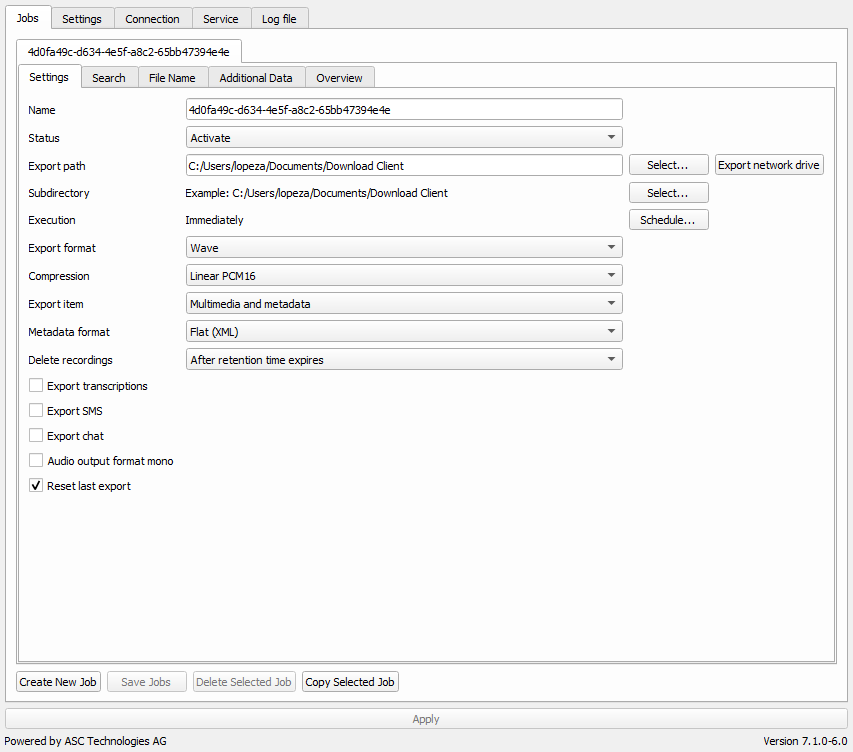
The fields available in the Jobs: Settings subtab are listed in the following table.
| Name | Specifies the name for the job. This is auto-populated but can be modified. |
| Status | Set to Deactivate by default when creating or modifying a job.
Change to Activate and save the job when ready to start the service. |
| Export path | Specifies the location for the downloaded files.
NOTE: Avoid using the default path. Instead, create a new folder in your system and provide the path to the new folder. |
| Subdirectory | Specifies the subdirectory path.
This option allows the user to save the recordings in subfolders based on the date and the time of the recordings. |
| Execution |
Specifies how often the data is exported. Click Schedule to select the recurrence pattern.
NOTE: To enter the date and time, use either the keyboard or the calendar function.
The following recurrence patterns are available:
- Immediately: The data is exported immediately upon clicking Save.
- Once: The data is exported only once.
- Every minute: The data is exported in the selected interval.
- Daily: The data is exported daily.
- Weekly: The data is exported weekly.
- Monthly: The data is exported monthly.
If no other file has been saved, the service uses the configuration file located at the following path C:\ProgramData\ASC\ConversationDownload |
| Export format | Specifies the export format for the audio files.
The following export formats are available:
| |
| Compression | Specifies the type of compression to use when downloading recordings:
- G.711 A-law
- G.711 μ-law
- G.729
- Linear PCM8
- Linear PCM16
The PCM methods do not use compressed output files, and therefore the files can be played by almost any player. However, these methods require more storage space.
| |
| Export item | Specifies the data to export.
The following export items are available:
- Audio and metadata
- Only audio data
- Only additional data
- Metadata as CSV file
To export metadata, select the required fields in the Additional Data tab.
NOTE: Metadata is saved as an XML file by default. To save as a CSV file, select the option Metadata as CSV file from the Export item list. | |
| Metadata format | Specifies the file format for the additional data (.XML or .CSV). |
| CSV file name |
Specifies the storage location and the file name for the CSV report of the additional data. You can save different report files.
NOTE: This option is available only if the Metadata format is set to CSV.
To use a new location, proceed as follows:
- Select the Reset last export and Overwrite current configuration check boxes at the bottom of the window.
- Click Save as next to CSV file name, and define the new storage location and file name.
- Click Save to save the configuration.
|
| Delete recordings | Specifies the time period after which the exported recordings are deleted. | |
| Export transcripts | Not applicable; this option should be disabled (checkbox cleared). |
| Export SMS | Not applicable; this option should be disabled (checkbox cleared). |
| Export chat | Not applicable; this option should be disabled (checkbox cleared). |
| Audio output format mono | All audio recordings are converted into digital signals. Generally, either stereo or mono can be selected for every output format.
If stereo is selected, the audio data is saved as originally recorded.
If mono is selected, all data is mixed on one channel so that everything is audible on the left speaker but not on the right speaker. |
| Reset last export | Resets the last export. |
Jobs: Search
The criteria for selecting the recordings to download are configured using this tab.
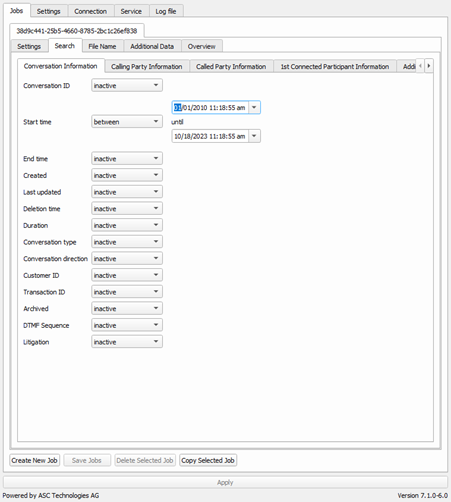
For the search, different search criteria are available under several search categories:
- Conversation Information
- Calling Party Information
- Called Party Information
- 1st Connected Participant Information
- Additional Customer Data
- Statistics
For all search criteria, you can select different comparison parameters from a drop-down list.
In general, the comparison parameters listed in the following table are available.
| Parameters | Description |
| inactive | The search criterion is ignored for the search. |
| between | A search is done for objects that have a value within the entered range. Objects having the initial and the final values are included in the search result. |
| period of time | A search is done for objects in the selected period of time. |
| equal | A search is done for objects that exactly match the entered value. |
| not equal | A search is done for objects that do not match the entered value. |
| greater or equal | A search is done for objects that have a value greater than or
equal to the entered value. |
| greater than | A search is done for objects that have a value greater than the
entered value. |
| smaller or equal | A search is done for objects that have a value less than or
equal to the entered value. |
| smaller than | A search is done for objects that have a value less than the
entered value. |
| starts with | A search is done for objects that start with the entered value. |
| does not start with | A search is done for objects that do not start with the entered
value. |
| ends with | A search is done for objects that end with the entered value. |
| does not end with | A search is done for objects that do not end with the entered
value. |
| contains | A search is done for objects that contain the entered value. |
| does not contain | A search is done for objects that do not contain the entered value. |
| in | A search is done for objects that match one or more of the entered values. |
| not in | A search is done for all objects that do not match at least one of the entered values. |
Jobs: File Name
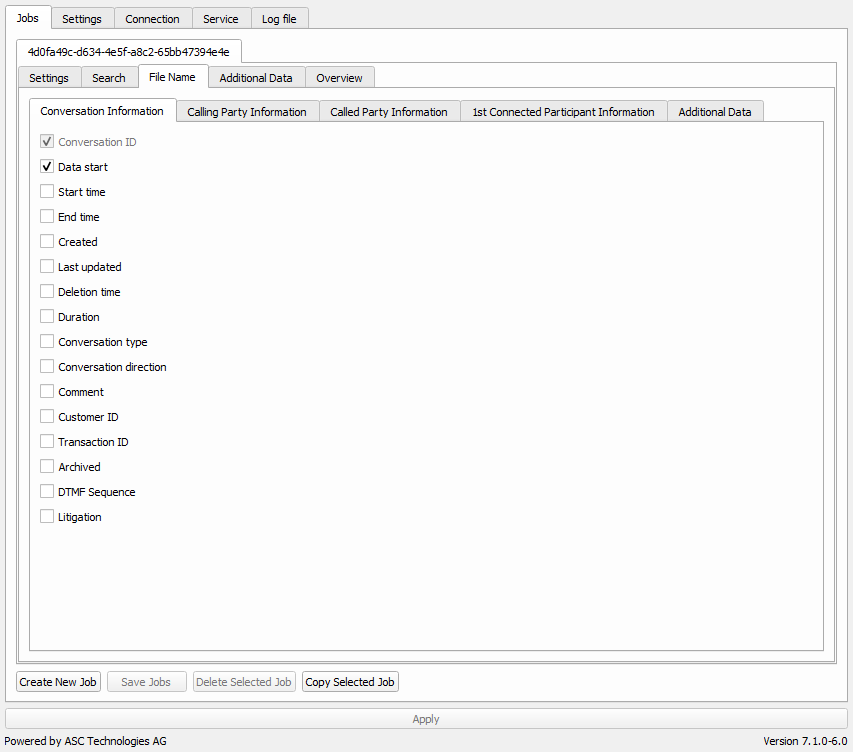
The additional data to use in the file name when the file is exported can be configured in the Jobs: File Name subtab.
The individual sets of information are separated by underscores. The sets of information are displayed in the file name in the order in which the fields are selected.
The default file name must include Conversation ID. Selecting many fields in the Jobs: File Name subtab will lead to a lengthy file name.
The information about the file name is sorted into the following categories:
- Conversation Information
- Calling Party Information
- Called Party Information
- 1st Connected Participant Information
- Additional Data
Jobs: Additional Data
The additional data to export in the metadata files are configured in the Additional Data tab.
The selected fields in the
Additional Data tab determine the fields in the metadata file. When no fields are selected, the metadata will not display any information.
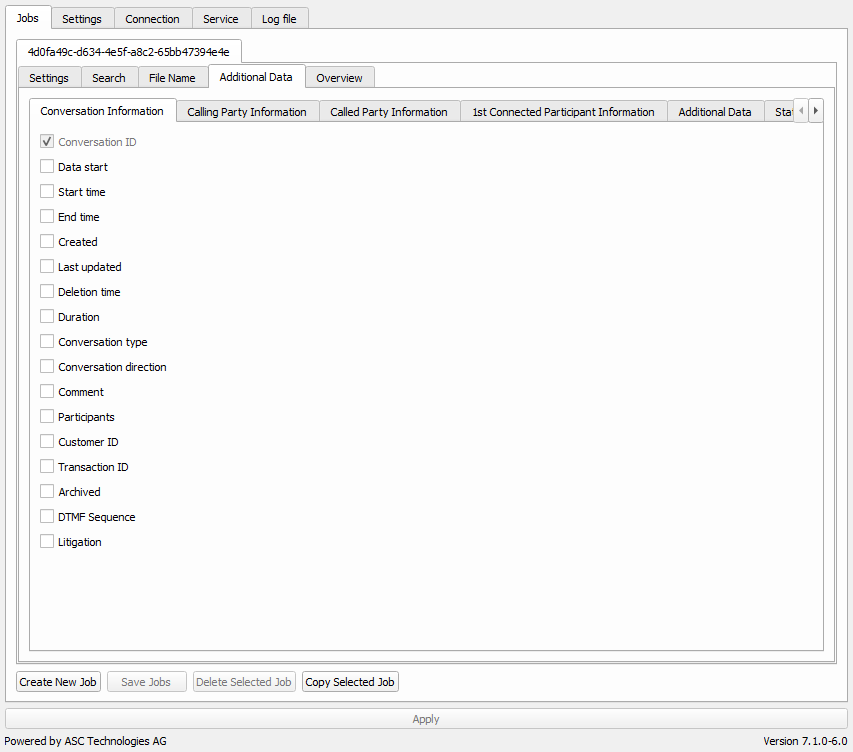
Following are the available categories of additional data:
- Conversation Information
- Calling Party Information
- Called Party Information
- 1st Connected Participant Information
- Additional Customer Data
- Statistics
Jobs: Overview
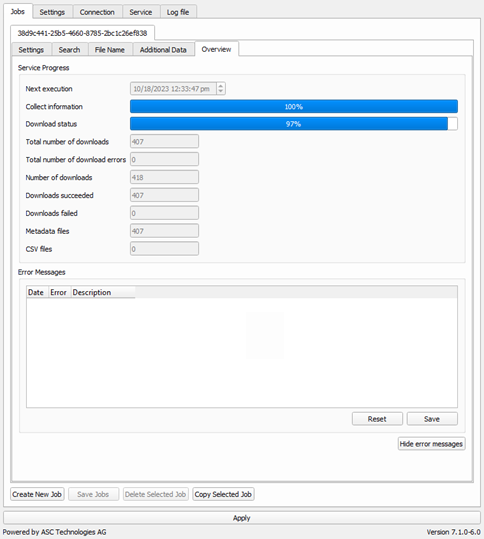
The status and progress of a service can be monitored using this tab.
The following fields are available in the
Overview subtab:
- Next execution
- Collect information
- Download status
- Total number of downloads
- Total number of download errors
- Number of downloads
- Downloads succeeded
- Downloads failed
- Metadata files
- CSV files
- Error Messages
Settings
The general settings such as language and format of date and time can be configured in the Settings tab.
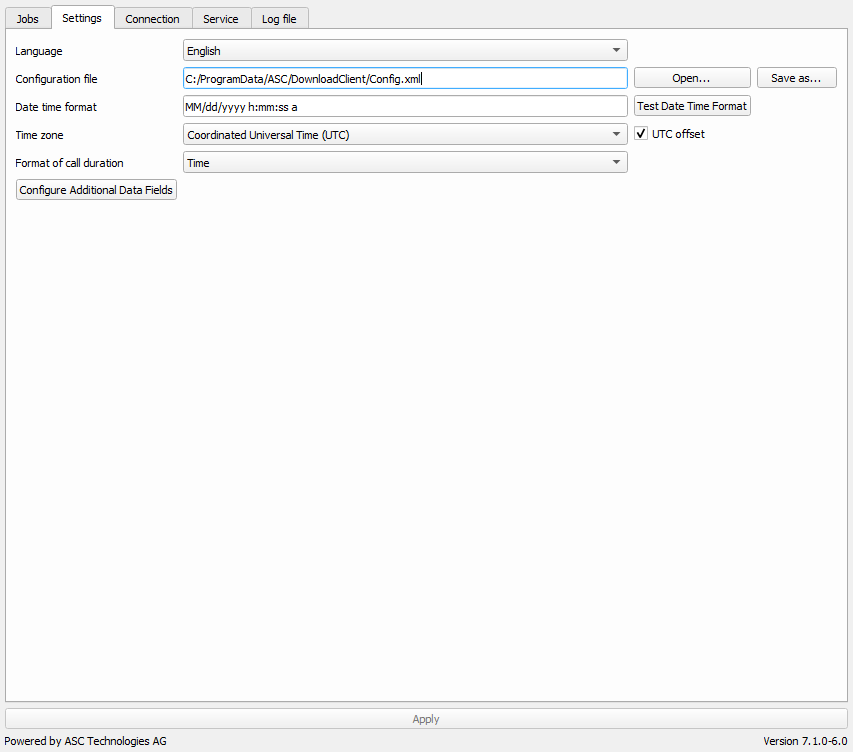
The fields available in the Settings tab are listed in the following table.
| Field | Description |
| Language | Specifies the language.
The following languages are available:
|
| Configuration file |
Specifies the storage location of the configuration file. You can save and load different configuration files to run individualized searches or create several client users for your client computer.
To select any of your previous configurations saved in the system:
- Click Open to load the configuration file that you want to use for the export.
- Click Apply to save the currently selected configuration file and use it for the export.
|
| Date time format | Specifies the date format and the time format to use for the additional data.
Click Test Date Time Format to check the selected date and
time formats in advance. |
| Time zone | Specifies the time zone displayed in the Download Client application and log files (UTC or Local time). |
| Format of call duration | Specifies the format to use for displaying the call duration.
Click Test Duration Format to check the selected format
in advance. |
| Configure Additional Data Fields |
In the Download Client application, you can use all customer-specific additional data that has been configured in the Additional Data tab.
NOTE: These fields are not compared against the display name configured in the Additional Data tab. You can configure a separate display name for each language.
Select all customer fields that you want to use to search, export, or rename files.
To configure customer fields:
- Click Configure Additional Data fields.
The Customer Fields Configuration window opens. - Select a customer field from the drop-down list.
- Click the text field next to the drop-down list to enter a new name for the customer field, or retain the same name displayed in the text field.
- Select the Display customer fields check box.
- Click Ok.
The additional customer data is displayed in the Search, Additional Data, and File Name tabs in the category Additional Customer Data.
|
Connection
The connection data such as the server address, port, and connection attempts are displayed in the Connection tab.
NOTE: The authentication details are automatically populated.
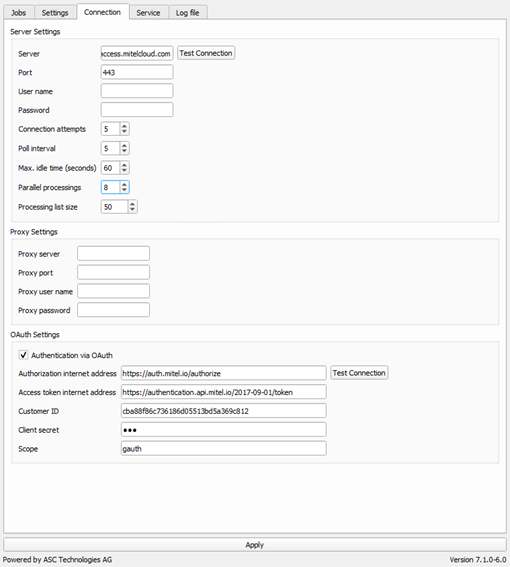
The fields available in the Connection tab are listed in the following table.
| Field | Description |
| Server | The address of the app server.
Click Test Connection to check the connection to the app
server. |
| Port | The port number of the port used for the HTTPS connection to the app server.
Default value: 443 |
| Connection attempts | The maximum number of attempts made to connect to the app server. |
| Poll interval | The time, in seconds, before the next poll interval starts.
Default value: 5 seconds |
| Max. idle time (seconds) | The time, in seconds, before the next export starts if the connection to the app server is lost. If the connection cannot be reestablished during this period of time, the export is discarded.
The export will be triggered after the connection has been re-established. |
| Parallel processings | The number of exports to process in parallel. the recommended setting is 8. |
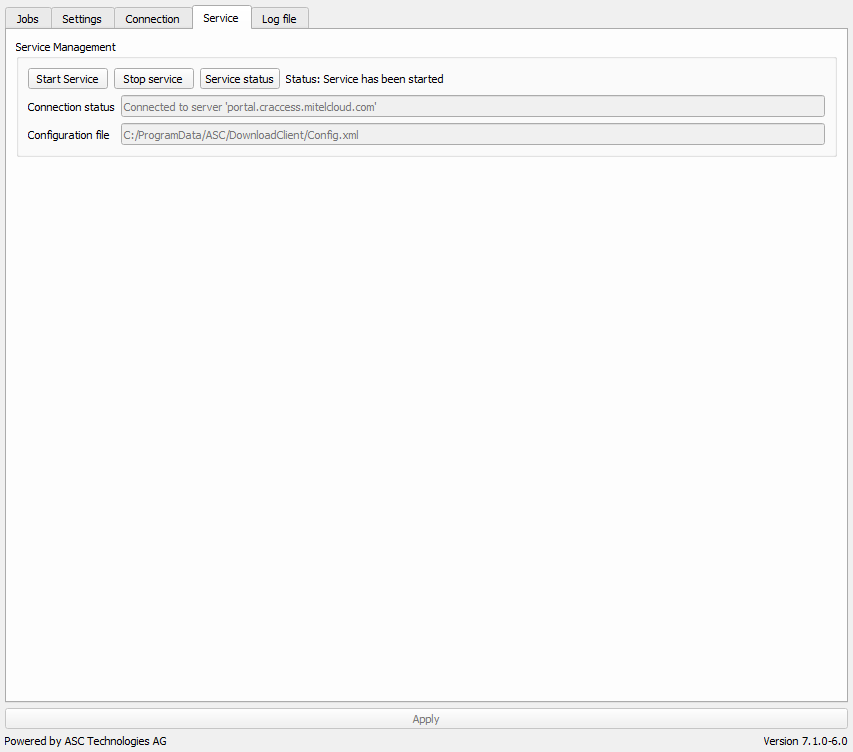
Service
You can start or stop a service from this tab. The status, connection status, and configuration file can also be viewed from this tab.
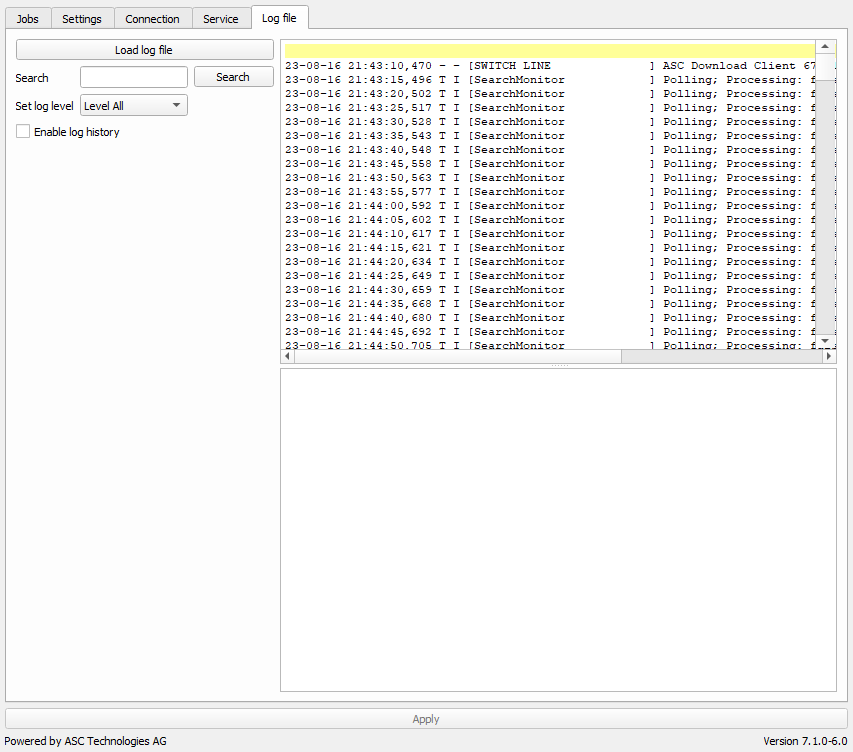
Log File
The Download Client application log files can be accessed using this tab.
Downloading Recordings
After configuring the Download Client application for your specific requirements, you can download the recordings to the system.
The download of recordings starts immediately or according to a schedule, as per the recurrence pattern set in the Execution field in the Jobs: Settings subtab. Depending on the amount of data, this may take several minutes.
NOTE: To download the recordings immediately, you must have set the Execution field in the Jobs: Settings subtab to Immediately.
To start downloading the recordings immediately:
- Select the Service tab.
- Click Start Service.
NOTE: If the service has already started, click Stop Service. Wait a few minutes and then click Start Service.
You can view the progress and status on the Jobs: Overview subtab.
It's recommended that you ensure the same search configuration, when used for performing a search in the MIR portal, displays a list of recordings in the portal. If the search returns no results in the MIR portal, the Download Client application will return an error message for the search. For more information about performing a search in the portal, see the
Running a New Search section of
Accessing the Interaction Recording Portal.
Uninstalling the Download Client Application
NOTE: Make sure you exit the application and create a backup of all the recordings exported to your system before you proceed with uninstalling the application.
To uninstall the Download Client application:
- Open the Download Client software directory.
- In the directory, double-click the uninstall.bat file.
- Click Yes to confirm.
- In the User Account Control window, click Yes to proceed with the uninstallation.
A status bar indicates the progress of the uninstallation. - Click OK.
The Download Client application is successfully uninstalled.
Upgrading the Download Client Application
When a new version of Download Client application is available, you can upgrade the application installed in your system to the new version to have the latest fixes and features of the application. You must create a backup of all the recordings exported to your system before you proceed with upgrading the application.
To upgrade the Download Client application:
- Uninstall the Download Client application.
- Download and save the latest Download Client software directory to your computer from here.
- Install the Download Client application.
The latest version of the Download Client application is installed and the version number is displayed at the bottom-right corner of the application.
IMPORTANT: After upgrading the Download Client application, the configurations saved using the previous version of the application will not be available for use.
Troubleshooting and Additional Information
Upgrading from Version 6.1 to Version 7.0
If, after upgrading, you attempt to download recordings and nothing is downloaded, follow the procedure below.
- Close the Download Client application.
- Navigate to C:\ProgramData\ASC\DownloadClient and move the Config.xml file to a new folder.
- Launch the Download Client application, reenter the search parameters, and restart the service.
- The recordings should start downloading.
If the above procedure does not resolve the issue, follow the procedure below.
- Close the Download Client application.
- Uninstall the Download Client application.
- Navigate to and delete the C:\ProgramData\ASC\DownloadClient directory.
- Reinstall the Download Client application.
Download Speed
While the updated version of the Download Client application does have a faster download speed, it also utilizes more CPU processing than the older version. Most users should not notice this change. However, if you do notice a slowdown, you can reduce the number in the Parallel processings field on the Connection tab. Note that reducing this number will also slow down the number of calls downloaded per hour.


