The MiCloud for Salesforce Application and its Cloud Softphone is the Salesforce integration based on Saleforce’s Open CTI (Computer Telephony Integration) framework. This application supports Citrix and Windows Terminal Services (WTS) environments.
Requirements
- MiCloud Users must have a Premier bundle or above.
NOTE: MiCloud Contact Center is not required to utilize MiCloud for Salesforce - Contact Center agents that wish to use the embedded agent controls must have a Premier bundle and an Agent Premier Bundle
- The Call Center definition file and, optionally, the Apex package must be loaded and configured in the Salesforce instance (Salesforce admin access required. Apex package requires Salesforce Enterprise Edition or higher).
Considerations
- MiCloud Contact Center agents must have an Agent Premier or above profile AND must have the "Enable as CRM user" parameter enabled on their agent profile in Contact Center Director in order to use the agent controls in version 5.4.
- MiCloud Contact Center agents may use the agent controls in version 5.4 OR the Agent Interaction Center (AIC) webpage, but not both at the same time.
- This application will always run using HTTPS (SSL encryption) on MiCloud systems so no special settings are required on the browsers.
- This integration is built on Salesforce's Open CTI framework.
- This application is completely browser based and requires no desktop client software.
Salesforce Compatibility
- Classic, Classic Console, Lightning and Lightning Console.
- Professional Edition of Salesforce and above support the core CTI feature set.
- Enterprise Edition or above are required for the advanced call log features such as custom Activity fields (Apex package must be installed for these features to work). Advanced features are not supported on the Professional Edition.
MiCloud for Salesforce Implementation
Step 1 - Downloading the Call Center Definition File
- Click the link to download the Call Center Definition file.
https://staasf.shoretelsky.com/STCloudCallCenterDefinition5.xml - Right-click the browser window and click Save As to save the file.
- Save the web page to your desktop. You can also save the webpage using Ctrl + S on the keyboard.
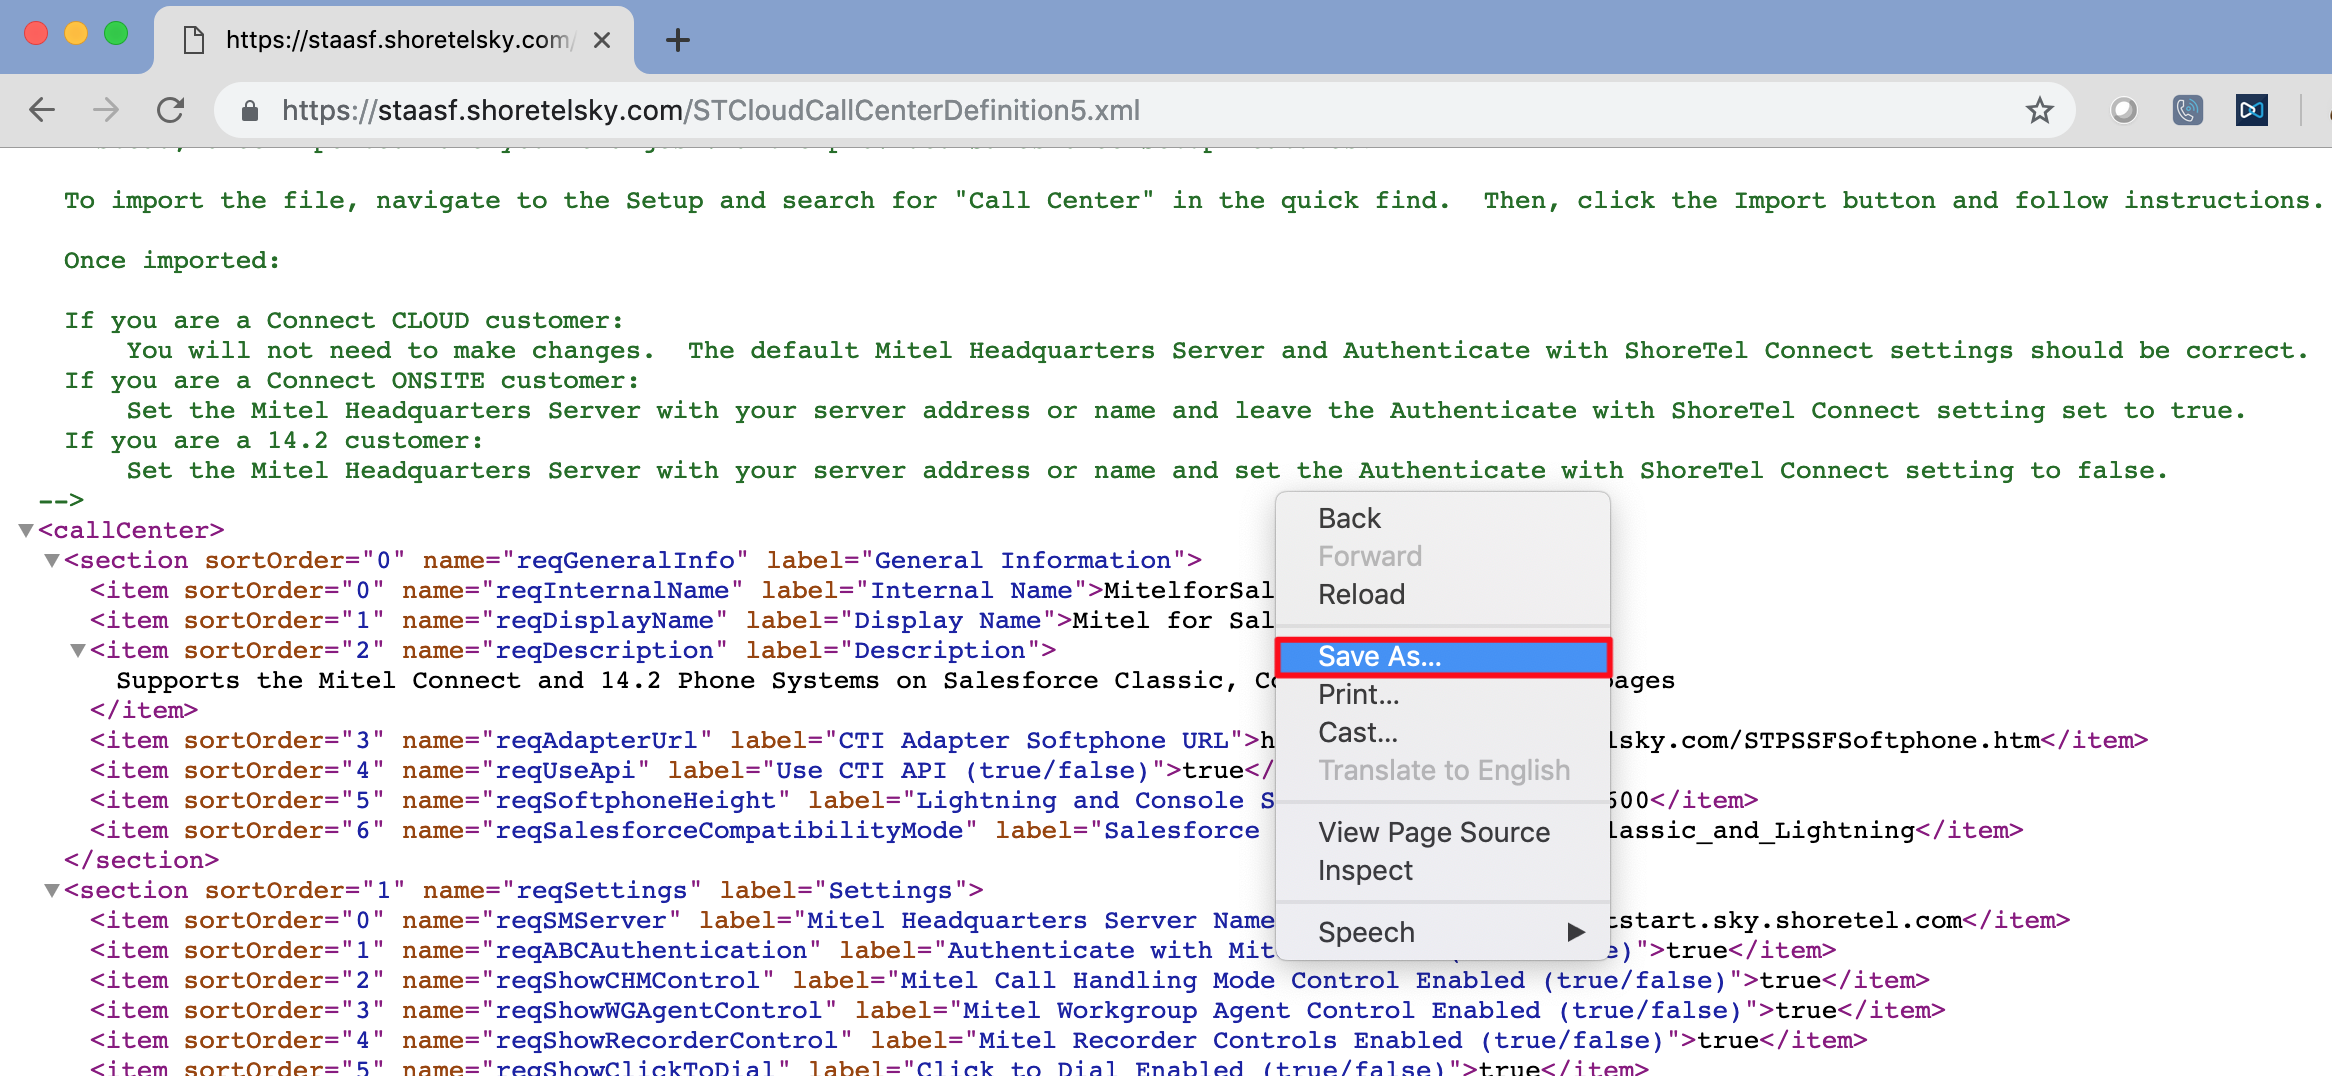
- The file name should be the default file name, STCloudCallCenterDefinition5.xml.
- Click Save.
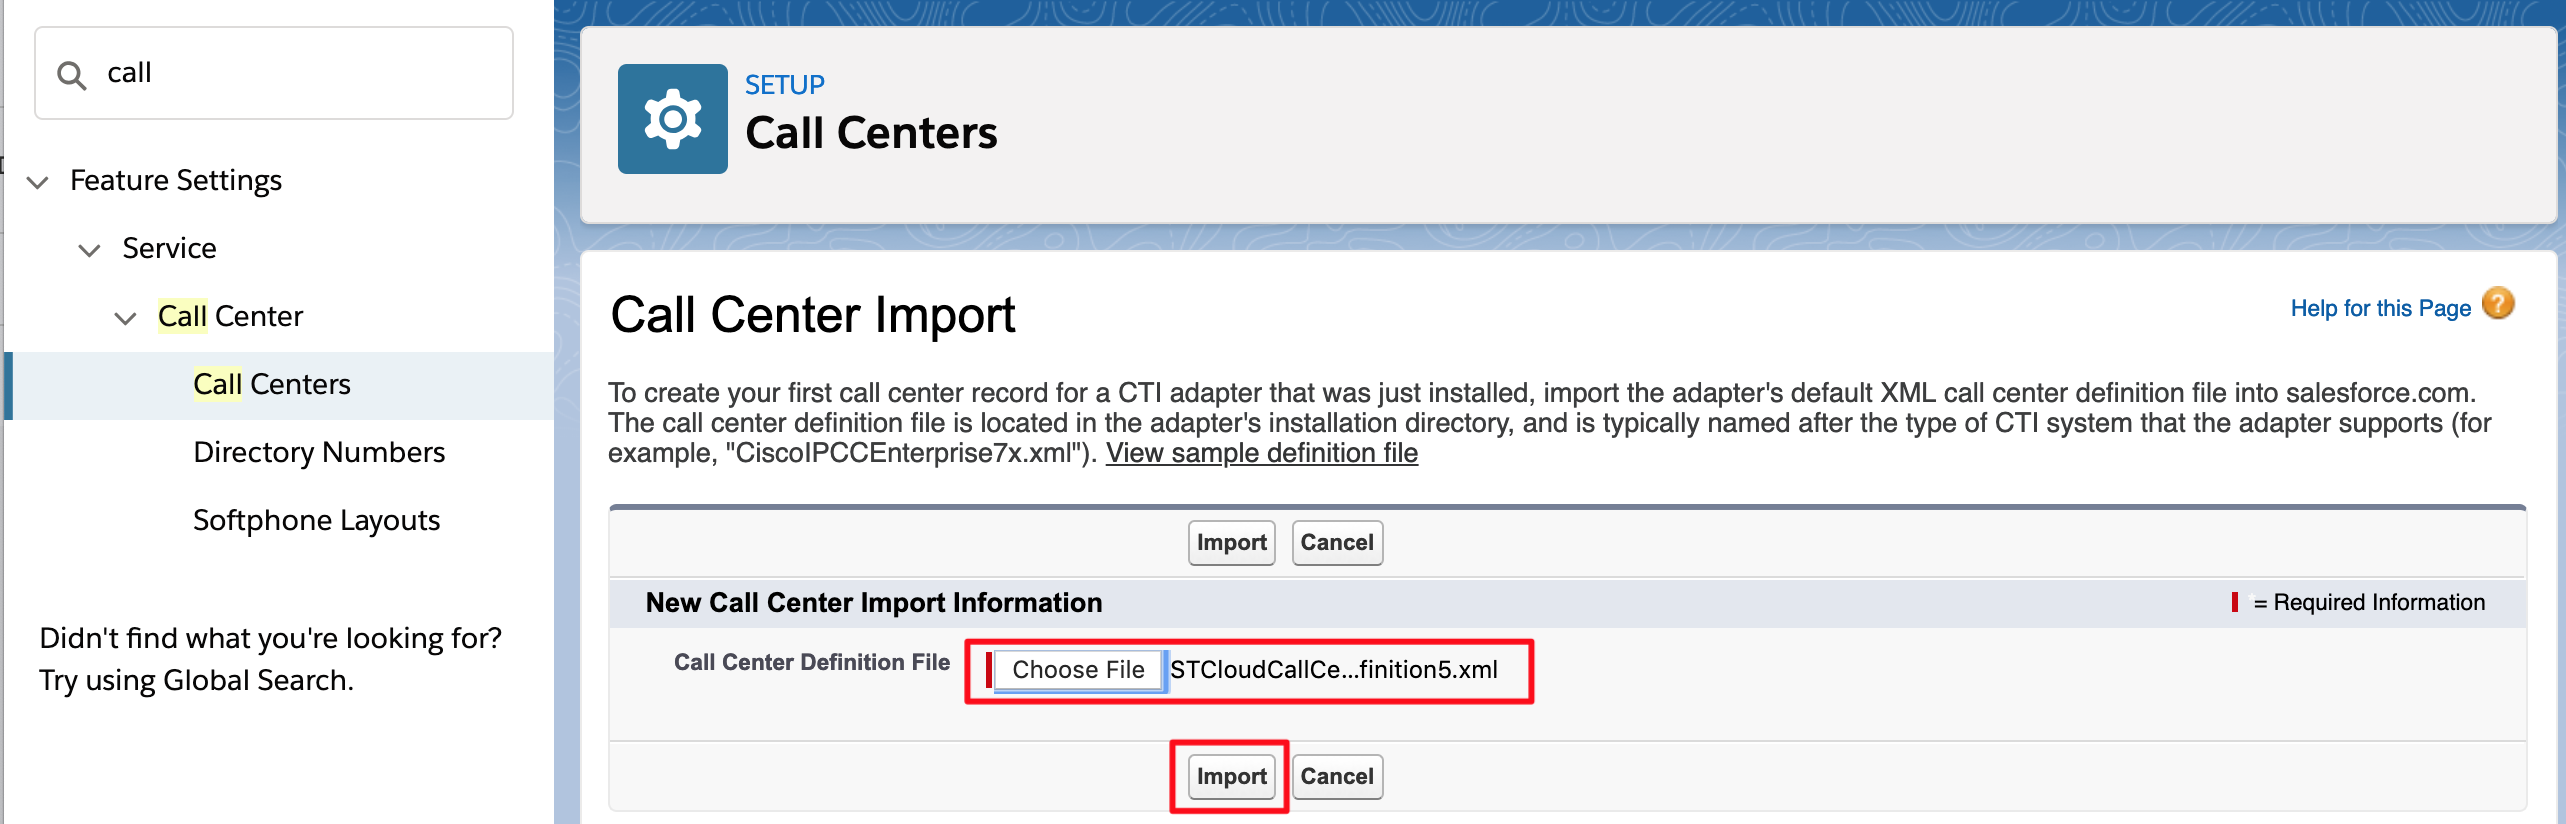
Step 2 - Importing the Call Center Definition File
After the Call Center Definition file is downloaded, the Salesforce administrator has to import it into Salesforce to create the Call Center.
- Log on to the Salesforce with the administrator credentials.
- From the User drop-down menu, click Setup.
- On the Search bar, type call.
- On the All Call Centers page, click Import.

- Click Choose File, and select the downloaded file, STCloudCallCenterDefinition5.xml.
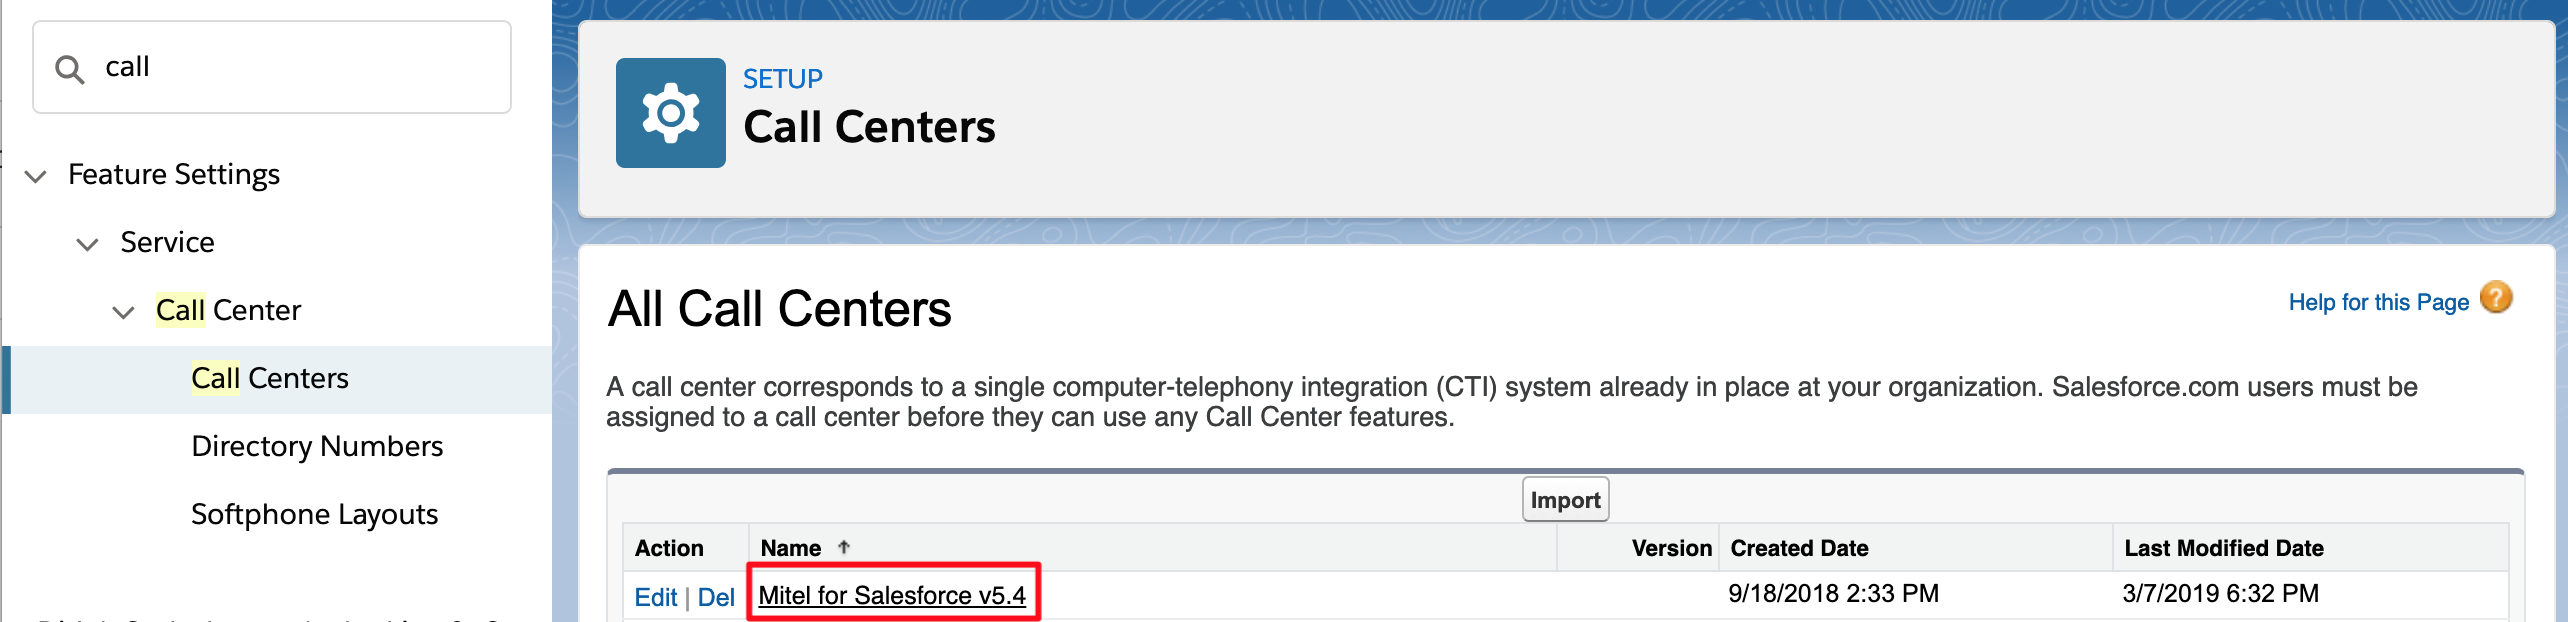
- The following image shows the properly installed “MiCloud for Salesforce 5.4” Call Center.
Step 3 - Configuring the Call Center Definition
Salesforce administrator must configure several settings of the “MiCloud for Salesforce v5.4” Call Center adapter.
- Click the MiCloud for Salesforce v5.4 Call Center adapter that was installed by the previous import procedure.
- The “Call Center Detail” page is displayed for MiCloud for Salesforce Application.
- Click Edit at the top of the page to edit the settings.
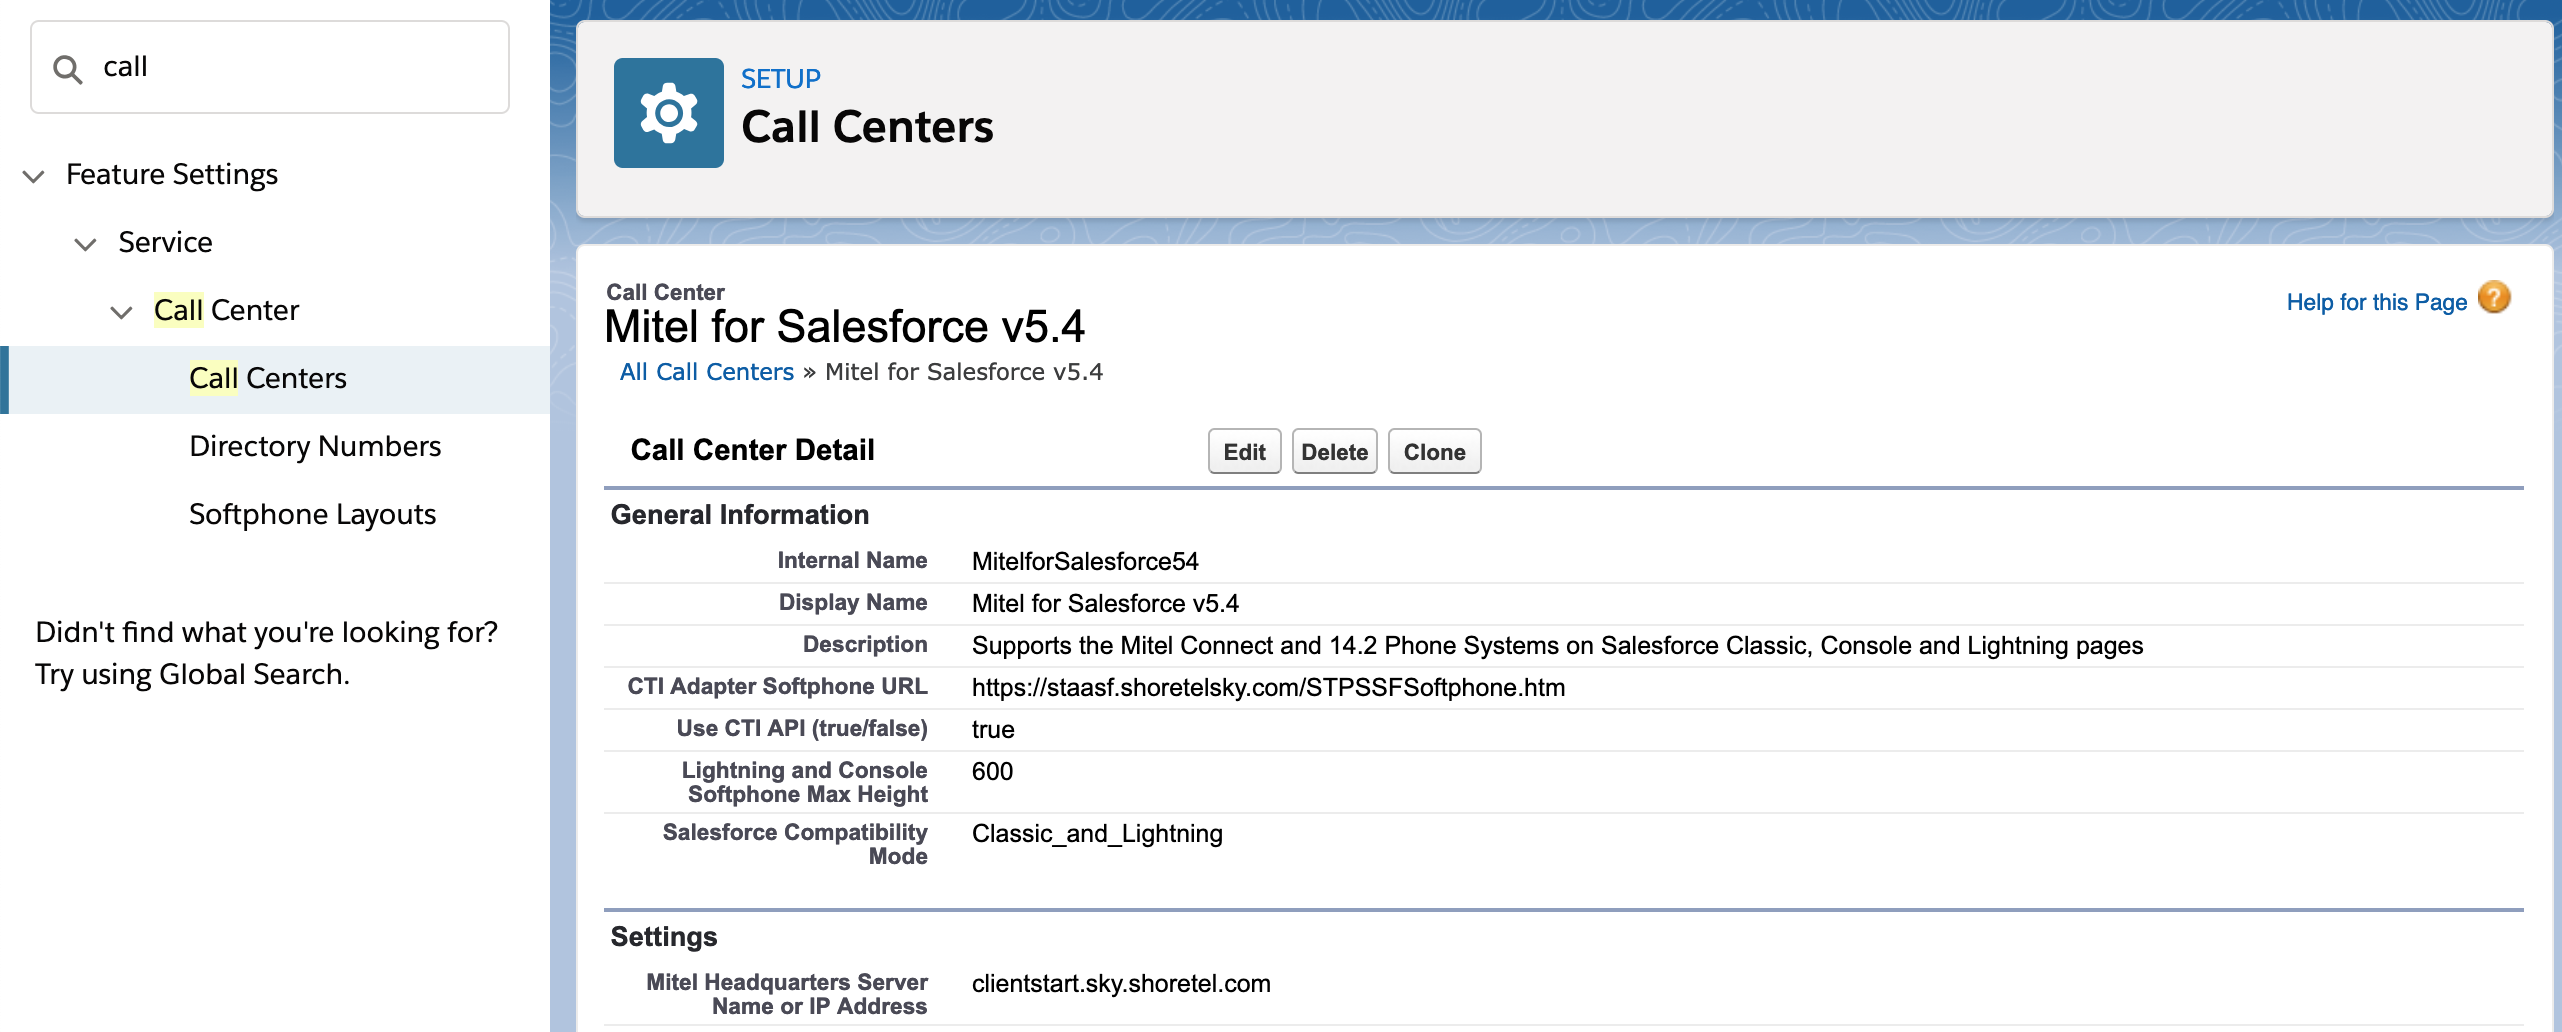
- Click Save at the top or bottom of the page to save the changes.
Some of the key settings to review:
- General information
- Settings
- Headquarters Server Name or IP Address:
- MiCloud: clientstart.sky.shoretel.com
- Authenticate with Connect: This value must be set to “true”.
Step 4 - Assigning Users to the Call Center
In addition to the basic configuration of the Call Center, the user must be assigned to the Call Center to activate the integration.
- Scroll to the bottom of the Call Center configuration and click Manage Call Center Users
- Click Add More Users.

- Search for the specific user(s). Select the box next to user name(s), and click Add to Call Center.
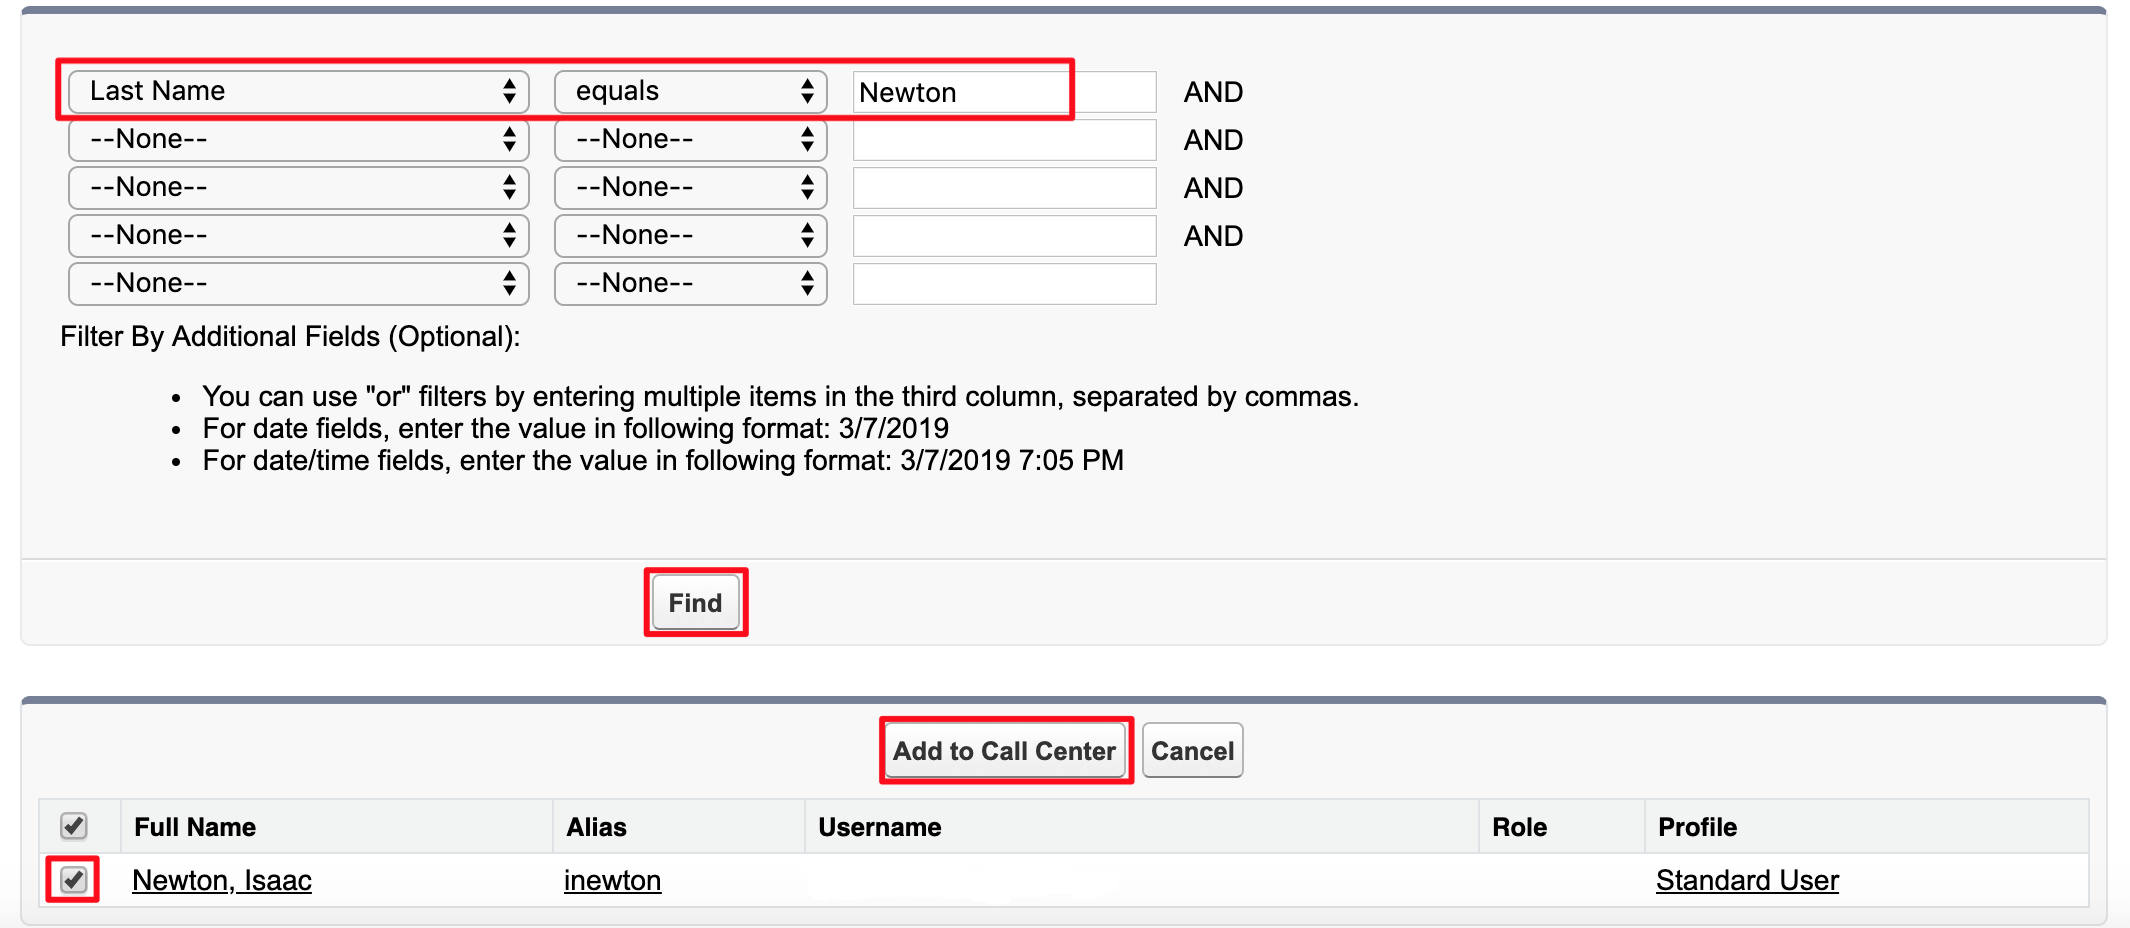
NOTE: To switch a user from an existing Call Center to a new one, first you have to remove the user from the existing Call Center.
Step 5 - Configuring Softphone Layout
Users must be associated with a valid Softphone Layout.
- Go to Setup
- In the quick find box, type call, and click Softphone Layout
- Click the Edit link next to the Default SoftPhone Layout.
The Softphone Layout Edit page appears.
- The top section controls the database objects that are searched for when a call is received. The default configuration includes Lead, Contact and Account.
If you want to include other database objects that contain phone number fields, click the Add/Remove Objects link.
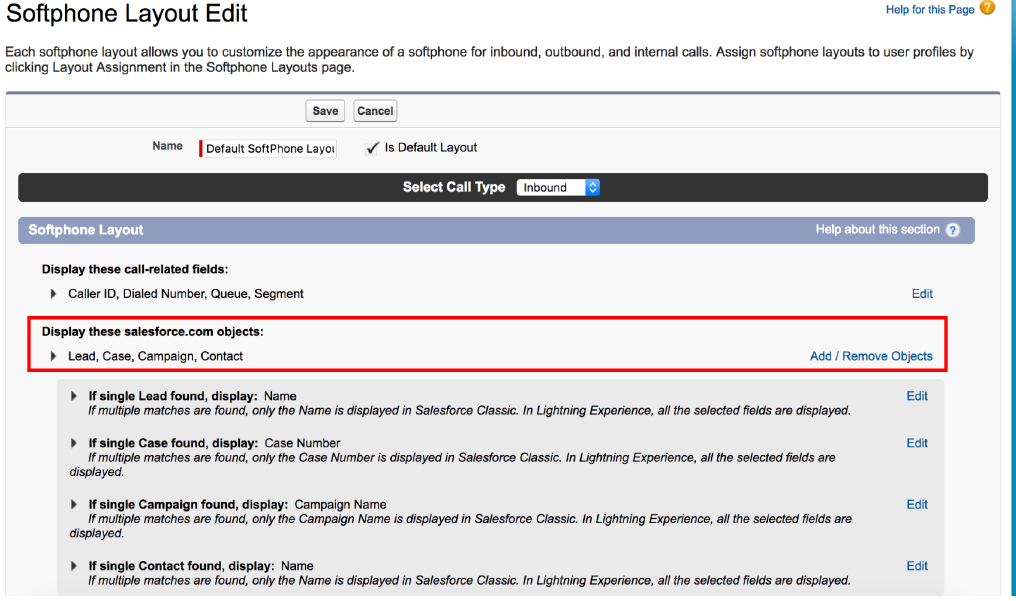
- The bottom section controls the behavior of the integration.
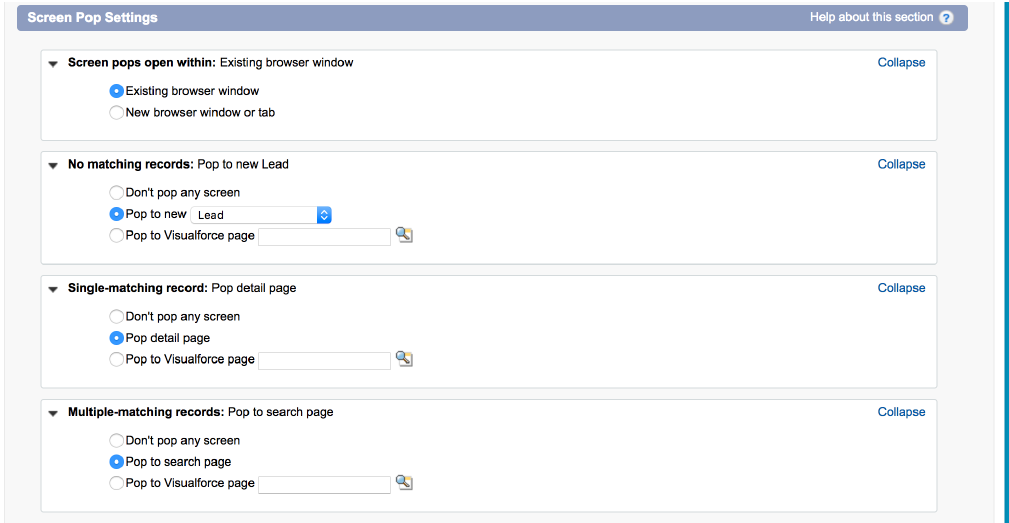
NOTE: The Screen Pop Settings portion of the Softphone Layout will only appear if the Salesforce Administrator is assigned to the Call Center.
For detailed information about the Screen Pop Settings, refer to MiCloud for Salesforce Admin Guide.
Step 6 - Adding the CTI Softphone to the Lightning Toolbar (optional)
This step is applicable only if you want to use MiCloud for Salesforce integration on Lightning.
- Click the User drop-down menu and click Switch to Lightning Experience.
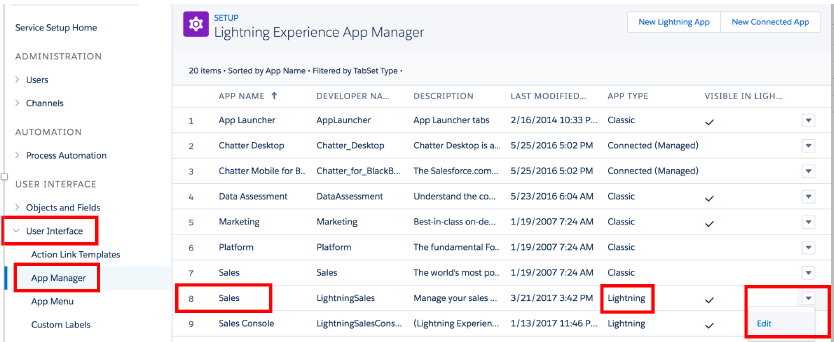
- Click the gear icon, and Setup. Then click Service Setup from the drop-down list.
- Select User Interface > App Manager. Find the app that your team uses. For example, the Sales App (note that this must be a Lightning type app).
- Click the down arrow on the right and select Edit.
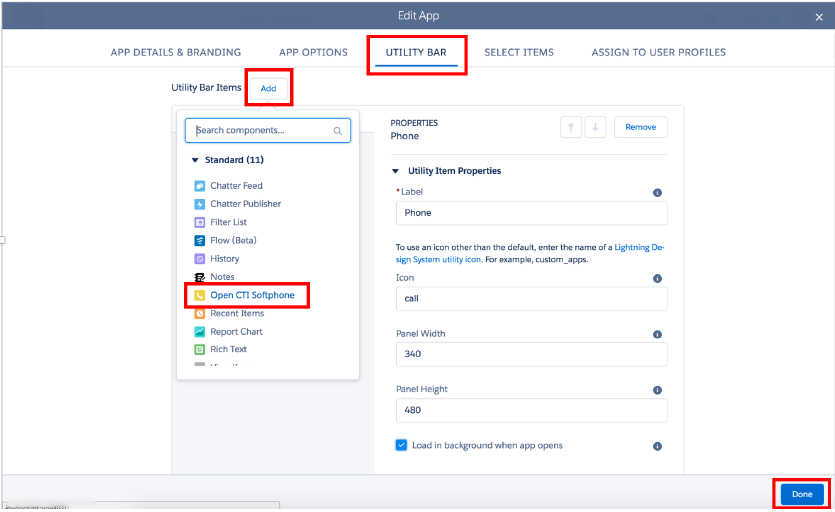
- Select Utility Bar and click Add.
- Select Open CTI Softphone, click Save, and Done.
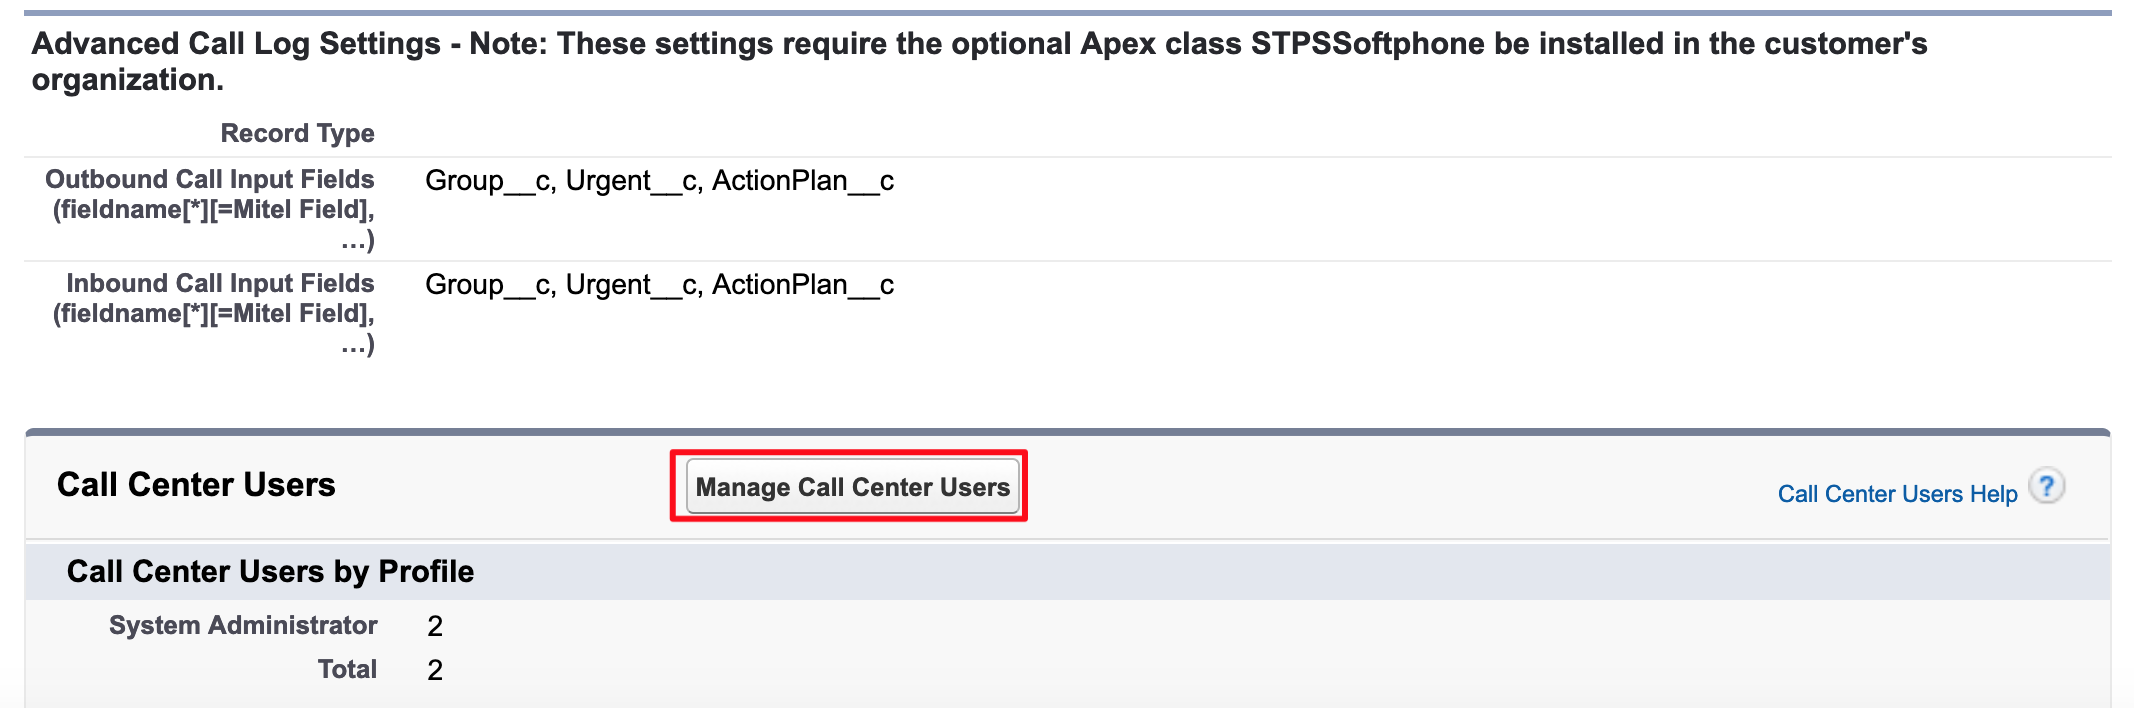
Step 7 - Installing APEX Package (optional)
There are several optional features of MiCloud for Salesforce that can be enabled by installing the additional packages containing some more Apex Classes.
This package is required to enable the following features:
- Using an existing Task Activities to seed a call note while making calls from open Task Activities advantage and/or navigate to an existing open Task Activity record and using it to seed the current call note.
- Configuring the additional Salesforce Task Activity fields to appear in the call note areas of the softphone.
- Supporting record search by alternate ID (for example, an account number from a Contact Center Call Profile field).
NOTE: This package can only be installed in the Salesforce Enterprise Edition or higher. The package is not supported on the Salesforce Professional Edition. To install the package in the Production and the Sandbox instance, refer to Salesforce Admin Guide.
Step 8 - Testing the Softphone
- Log in to Salesforce using your MiCloud credentials.
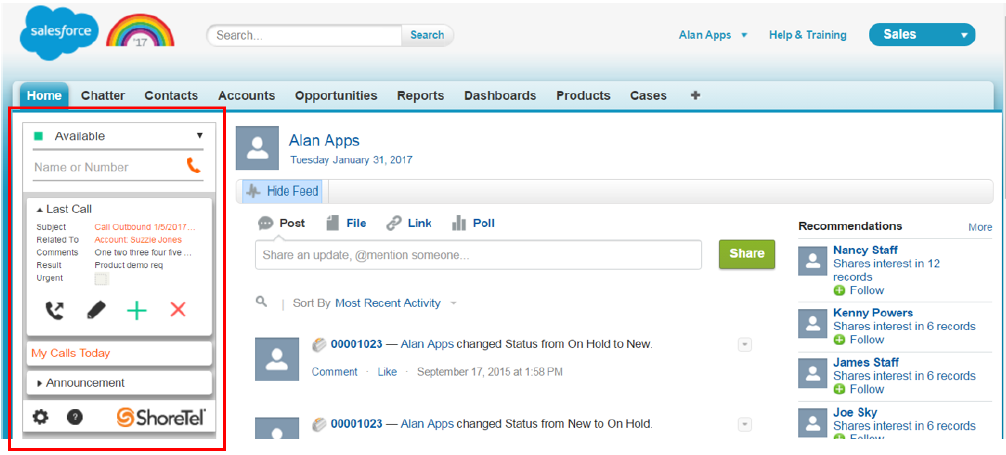
NOTE: Clicking the Sign In button opens a new browser tab/window. To log in, use the same credentials that you use to log in to the Client. (For information about MiCloud single sign-on, see Unified Sign In.) - The softphone is displayed. The following image shows the Salesforce Classic interface as an example:
For more information about softphone display errors, refer to the MiCloud for Salesforce Admin Guide.

