MiCloud supports the following Analog Telephone Adapters (ATAs) for use with analog conference phones and analog phones:
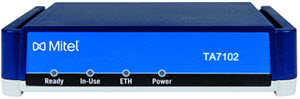
- Mitel TA7102 (2 ports)
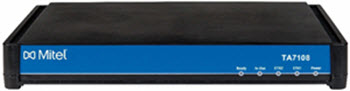
- Mitel TA7104 (4 ports)

- Mitel TA7108 (8 ports)
The Mitel TA7100-series Analog Telephone Adapters are versatile ATAs that are supported by the MiCloud phone system. These devices enable analog devices to interact with a VoIP phone system. These ATAs work well with conference phones and analog phones. These devices have not been tested and verified with Fax or Credit Card Terminal devices in the MiCloud environment.
For more general information about the Mitel TA7100-series, see Mitel TA7100 Terminal Adapters. (However, be aware that while this information mentions Fax and Credit Card Terminal, in the MiCloud environment these ATAs have been tested and verified only on conference phones and analog phones.)
Setting up the Mitel TA7100-Series ATA
Use the following instructions to set up a Mitel TA7100-series ATA and retrieve the IP address assigned to the device. The IP address is needed for accessing the web interface for the ATA device.

- Plug in the power cable and connect the WAN port to the network.
NOTE: For the Mitel TA7104 and TA7108 ATAs, Eth1 is the WAN port. - Plug the phone into the PHONE port.
- Lift the handset and press *#*0 to hear the IP address.
Configuring the Mitel TA7100-Series ATA
Before you begin to configure the Mitel TA7100-series ATA, click
here to download the necessary certificate file (
thawte Primary Root CA - G3.cer).
- In the address bar of any web browser, type the IP address assigned to the ATA and then press Enter.
The ATA admin log in page is displayed. - Log in using the following credentials:
- User: admin
- Password: administrator
- Select the Management tab, and then select the Certificates subtab.
- Click Activate unsecure certificate transfer through web browser.
- Under Certificate Upload Through Web Browser, do the following:
- In the Type list, select Other.
- Click Browse, and then navigate to and select the thawte Primary Root CA - G3.cer file.
- Click Import.
A new line appears under Other Certificates. - Click Apply.
- Select the Configuration Scripts subtab, and then configure the settings as follows:
- Specific File Name:
- Mitel TA7102: Mitel-7102-US.cfg
- Mitel TA7104: Mitel-7104-US.cfg
- Mitel TA7108: Mitel-7108-US.cfg
- Transfer Protocol: HTTP
- Host Name: upgrade01.sky.shoretel.com
- Location: Mitel-TA710x
- Execute On Startup: Enable
- Click Apply.
- Select the Firmware Upgrade subtab, and then configure the settings as follows:
- Version: 2.0.30.555
NOTE: This is the currently supported firmware version. - Automatic Restart Enable: Enable
- Firmware Pack: Dgw
- Transfer Protocol: HTTP
- Host Name: upgrade01.sky.shoretel.com
- Location: Mitel-710x
Leave all other parameters at the default values. - Click Apply.
- Select the Network tab, and then select the Host subtab.
- Under SNTP Configuration, configure the settings as follows:
- Configuration Source: Static
- Primary SNTP:
- Off-net: pool.ntp.org
- On-net: Enter the IP address of the voice gateway.
- Click Apply.
- Select the Reboot tab, and then click Reboot to reboot the ATA device.
The default configuration file is downloaded to the Mitel TA7100-series ATA, and the device is automatically configured to work on MiCloud. Once the file has been executed, the device will restart and you can assign a user to the device.
NOTE: If NTP is not working, the ATA will not register accounts or devices with the MiCloud system. - Log back into the ATA device.
- Select the SIP tab, and then select the Registrations subtab.
- Under Endpoints Registration, configure the settings for the Phone-Fax1 (Mitel TA7102) or FXS1 (Mitel TA7104/TA7108) endpoint as follows:
- User Name: Enter 1+ the 10-digit phone number of the connected phone.
- Friendly Name: Enter the phone number of the connected phone or another easily identifiable name for the phone.
- Register: Enabled
- Messaging: Disable
- Gateway Name: all
- Click Apply.
- Select the Authentication subtab.
- Under Authentication, click the edit (pencil) button on line 1, and then configure the settings as follows:
- Criteria: Endpoint
- Endpoint:
- Mitel TA7102: Phone-Fax1
- Mitel TA7104/TA7108: FXS1
- Validate Realm: Disabled
- Username: Enter 1+ the 10-digit phone number of the connected phone.
- Password: Enter the user's voicemail password for the phone
- Click Apply and Refresh Registration.
- Repeat steps 16-20 for each endpoint you want to configure (use Phone-Fax<number> for the Mitel TA7102 or FXS<number> for the Mitel TA7104/TA7108).
NOTE: Up to two endpoints can be configured on the Mitel TA7102 ATA, up to four endpoints can be configured on the Mitel TA7104 ATA, and up to eight endpoints can be configured on the TA7108 ATA.
Troubleshooting
If any of the lines display Configuration error or other configuration issues occur, use the following procedure.
- Download the Mitel-7100-US.cfg file attached to this article.
- Navigate to the Management tab in the web interface.
- Select the Configuration Scripts subtab, and then click Activate unsecure script transfers through web browser at the top of the page.
- Click Choose file.
- Navigate to and select the Mitel-7100-US.cfg file you downloaded in step 1.
- Click Upload & Execute; this may take a few minutes to complete.
- Once the upload is complete, the provisioned lines should show registered on the SIP tab > Registrations subtab.

